Showing posts with label custom order. Show all posts

Friday, September 20, 2013

"Treetop Owl, I think this is the beginning of a beautiful friendship"

So one September night I got a custom order request that would change my shop forever. I couldn't be more grateful for Kim's request for her friend's baby shower. She sent me a simple request to make the WOODLAND OWL set to match the bedding her friend had chosen for her nursery. Here's the bedding that was the inspiration:
Crib Bedding

Close up of the quilt

Pillow

Sometimes when I get custom item requests the client likes to be really involved and see how everything is going each step of the way. I totally don't blame them because I'd totally be the same way, but Kim was the total opposite, she pretty much gave me free reign to do whatever I wanted as long as I used the colors in the bedding and that would be able to be hung in the nursery after the shower. I don't know which is more pressure! Let's get to the good stuff:

The owls:

Aqua
Orange
Peridot
Ruby

I also used:
The nest...
...and the tree!
Kim needed an "it's a boy" banner:


And a name banner for little Max:


I was also able to make lots and LOTS of cupcake toppers:


To date my TREETOP OWL items have sold more than any other item in my shop! As happy as Kim and the mommy-to-be were with their items, I was even happier and grateful to Kim for inspiring such an awesome collection of items in my shop and making so many other people happy! Oh...here's what Kim had to say when she received her items "Got everything today! OH MY GOD! Soooooooo cute! I love them. I'm sure mama will too! Thank you so much!" Oh, and she left me some pretty awesome feedback for EVERYONE to see "LOVE, LOVE, LOVE! Everything was perfect! Custom made to my liking. Soooo cute! Can't wait for the mama-to-be to see it!"

Friday, September 13, 2013

A Banner Fit for a STAR little boy!

I love any chance I can get my crafty hands on to do custom orders for customers. I understand it takes a lot of trust from people who look at my shop to take a leap of faith and ask me to create something custom for them from an invitation, nursery bedding or just from nothing in particular. The blog will mostly focus on custom projects instead of featuring items in my shop (unless they are so stinkin’ cute and I get a chance to show off my adorable puppy as a bonus!) 

I was contacted by Abi at Monkey Tree Creations to make a banner for her substituting the owls for stars on the WOODLAND OWL Custom Name Banner :


What an easy request right? Wellllll…..the more we chatted about the order the more inspired I was getting and Abi sent me a link to the invitation she was purchasing:


Blue Polkadot Invitation from sillymedesign
This is where my wheels really started turning! I was able to come up with something really special. 

Finished Banner
 For this banner I used:
  • Sapphire Blue Pearlized Cardstock
  • Peridot Green Pearlized Cardstock
  • Diamond White Pearlized Cardstock
  • Chocolate Brown Pearlized Cardstock
  • Simply Sweet Cricut Font
Pearlized Cardstock -- My Favorite!!!
I love how the shape mirrors the invite but isn't quite literal.
Layered stars inspired by the invite

I used a lighter aquamarine color cardstock in the stars for more interest
Ribbon <3
Love it when it comes together!
Any time I send out a custom order based on something someone sent me I get pretty nervous. What I think is pretty awesome might not be what the buyer had in mind. When I get that alert on my phone that says “Received Conversation from XX” my tummy flips a little. But then when I see this “I got the banner today and it’s PERFECT!! I love it! Thank you so much!” it makes all the stressing worth it!

Monday, August 29, 2011

It's been awhile "Custom Monday"....nice to see you again

So I know I said about a month ago that I would be posting custom designs on Monday....well life sort of happened and I have been oh-so-busy with all the Delicious Paper Design orders that the blog has fallen to the wayside a little bit, but the good news is that I'm posting an awesome custom design inspired by the Etsy shop of yours truly!

I got a custom request for a cupcake themed birthday banner set. Here is the invitation inspiration from the client:
From LollipopPrints on Etsy
I was so excited to get started that I had so many ideas! I worked with the client to see what style of cupcake she liked (boy did I have a ton to choose from!) and here is the cupcake design she chose:

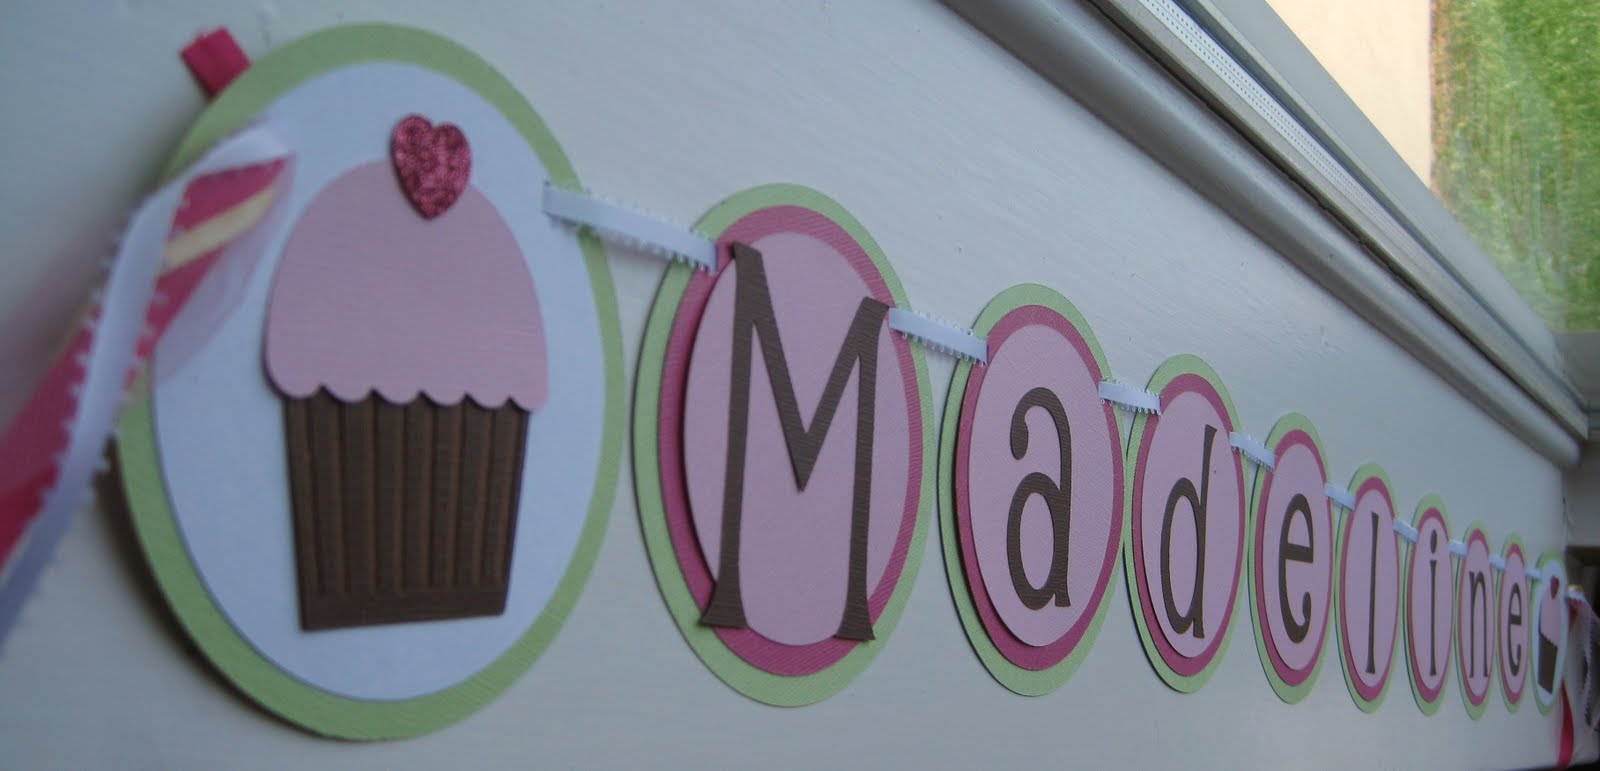
The star of the banner: The cupcake!
 The client wanted a name banner and a birthday banner. Here is how the name banner turned out:

Sweet little Madeline's name banner

I love the way the colors came out and the brown letter really pops!

I love how you can hang this after the party in a playroom or nursery.
 I think the birthday banner came out super cute too. This theme can really be for anyone, old or young...anyone with a sweet tooth! Just by removing the "1st" and let the white circle be the spacer for the banner you can reuse this over and over!
Add caption


I like to leave the circle between the two words white like the ends because I think it breaks up the words of the banner a little better. This way the words don't all run together. It also adds some visual interest and balances out the white on the ends as well.

So cute!

This banner (and all my birthday banners) measure over 6 feet long!
I think that this really turned out great! I love the way the cupcakes look, perfect for a sweet little girl! I think that this is going to be the next collection that I put out since I have been focusing mostly on the boys :)

What collection do you think I should add to Delicious Paper Design that would be a hit with kids?

Monday, July 11, 2011

Inspiration Falls

So the Disney bug has bitten big time (big surprise, eh?) and this post is all about INSPIRATION! If you can post a comment where in Disney you can see Inspiration Falls you win! (Prize: a special "good job" from me!)

Here is the inspiration of this week: Love Bird Bedding by Bananafish

Love Bird Bedding by Bananafish

Love Bird Bedding Quilt

Close Up

I had my inspiration and now it is time to gather up my materials!
Cricut Cartridges
Paper Pack (I already had this!!)
Ribbon
The  next step is to cut the largest layer of scalloped circles:
Green pattern coordinates with the leaves
Four on on page!
I cut my circles 1/2" bigger/smaller that way they have a 1/4" reveal when I am using traditional circles. However, when I am using scalloped shapes I go 3/4" larger than the shape that is getting matted on it (example, the green pattern was cut at 4 3/4" and the brown is cut at 4"). This is so the next layer leaves space were the dips in the scallops are. I have found that using only a 1/2" difference takes the circle right to the dip and the shape comes out looking too much like a flower (circles) or a postage stamp (squares) and if you are using a patterned paper you lose some of the pattern! 

 Next layer is brown:
In goes the brown: 4"

Tip: Cut 3 circles. Click over right 3 clicks. Flip paper cut 1. Click right 6 times. Cut 1. You can get 6 4" circles on one page this way! Less waste!! Hooray :)
Brown on Green Pattern
 Next layer is pink!
 Then the letters. I used Alpahlicious at 3 1/4". I cut the shadow out of brown and the regular layer out of a aqua with a cool blue stitch through it. 
Love this paper!
Baby Lorelai

All layered together!
Then comes the birdies! I cut one normal and then one on flip (3 1/2"), this way the birds look at each other and gives the banner a better overall look.
Plaid for one bird and one wing

Orange polka dot bird and wing

Mix and match patterns for that chic vintage look!
 
And of course a bow and rhinestone!!! Delicious!

String it on brown satin feather-edge ribbon and add the additional ribbons to the ends. 
Here is the final banner!


I am so in love with the way this banner came out! And so awesome of my customer to give me such awesome inspiration to work from! I love doing custom orders and these past few weeks I have had a TON 
 of custom designs. So watch for a regular spot on the blog: Custom Mondays! 

So that poses the question....
Where do you get your inspiration?